本篇要介紹如何在 Eclipse 下啟用 C++11 的語法高亮解析,啟用後將可以跳至定義處以及不會出現紅色底線。
設定 Eclipse 的語法解析器
Window -> Preferences -> C/C++ -> Build -> Settings -> Discovery -> CDT GCC Build-in Compiler Settings
在 Command to get compiler specs: 底下的 text box 加上 -std=c++11
原本是1
${COMMAND} ${FLAGS} -E -P -v -dD "${INPUTS}"
加上以後變成如下1
${COMMAND} ${FLAGS} -E -P -v -dD "${INPUTS}" -std=c++11
修改前如下圖所示:
修改後如下圖所示: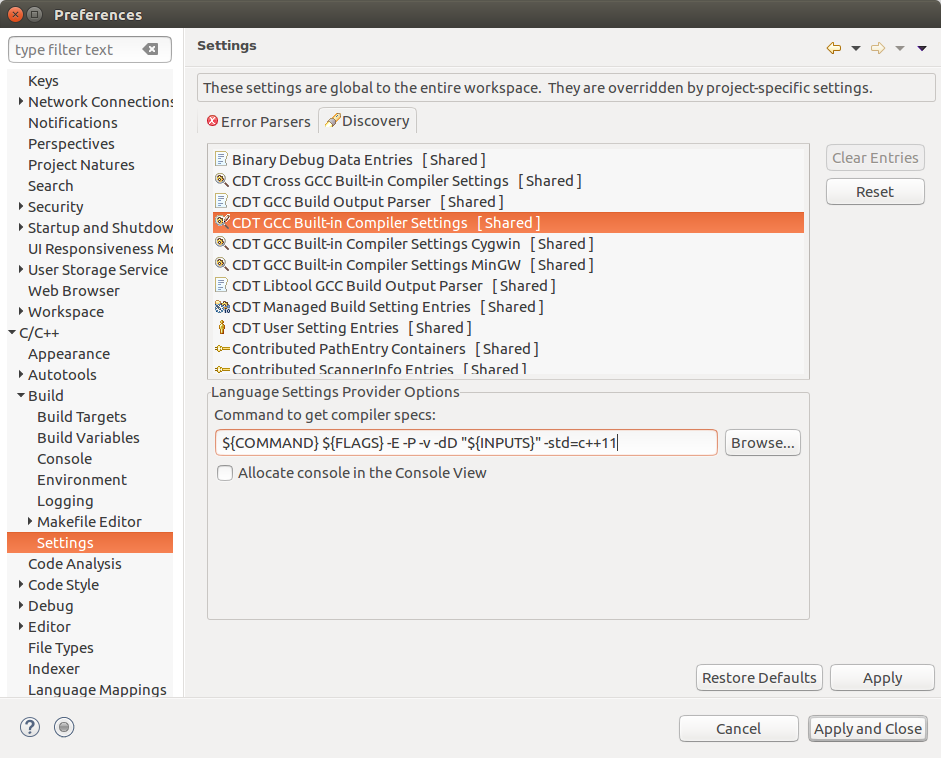
CMake project 設定方式
使用 cmake 產生出 Eclipse 的專案檔
(Eclipse 對 out-of-source build 支援比較差, 所以就不建立 build 資料夾了)
直接在專案目錄下輸入以下指令產生 Makefile1
2
3
4cmake . \
-G "Eclipse CDT4 - Unix Makefiles" \
-DCMAKE_ECLIPSE_VERSION=4.5 \
-DCMAKE_ECLIPSE_GENERATE_SOURCE_PROJECT=TRUE
之後再 Eclipse 使用 import 的方式匯入專案
對專案右鍵選擇 Properties -> C/C++ General -> Preprocessor Include Paths, Marcos etc. -> Providers
啟用 CDT GCC Build-in Compiler Settings 且把它移到高過於 Contributed PathEntry Containers (重要)
修改後如下圖所示: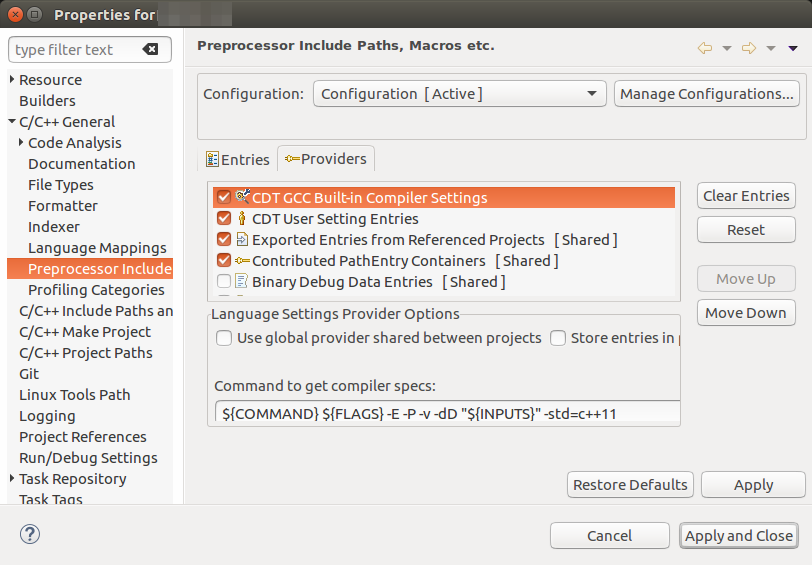
最後一步
重新產生索引檔, Project -> C/C++ Index -> Rebuild.
參考
c++ - How to enable C++11/C++0x support in Eclipse CDT? - Stack Overflow
https://stackoverflow.com/questions/9131763/how-to-enable-c11-c0x-support-in-eclipse-cdt/24561615